Monday

Before and after with ASCP

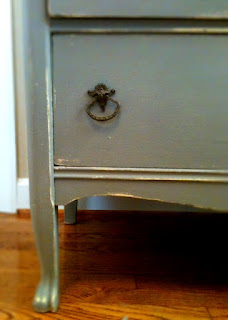
French Linen over an old yellow dresser
I have been hearing all over about ASCP so I couldn't wait to get my hands on some to see what the hype was about. I have been painting for years and have my favorites so I wasn't sure what to think. But something that is described as no stripping or sanding has a definite appeal. Thanks to the ladies at Hueology for their 31 day challenge on the paint, I think they inspired a lot of people to try it!
My first piece is not a wow piece, but a little more practical.  The cabinet was a good buy, but in a sage green, so I used ASCP in the Old White, then I lightly sanded it, some of the sage green came through which I liked. I haven't had time yet to put the clear wax on but will definitely do so. The paint does tend to dry fast, which does allow you to get another coat on sooner then you would have to wait for most paints.  Overall I am impressed with the paint, not as much with the price, but it does save you all the time you would normally have to spend on prep so I think it is worth it
before
after
Old White
This is the second piece I did and I love how it came out. It is an old dresser that belonged to my Grandmother and it had been sitting in my basement for a couple of years collecting dust, I had wanted to paint it black for awhile but decided to paint it in the French Linen and let some of the yellow underneath show through. The French Linen is a really nice tannish gray color.


before

after
It was great just to be able to slap on 2 coats of paint over the old yellow paint that was there without all of the prep. I then sanded some of the areas to let it show through to the yellow paint, even going down to the wood in some spots. This piece was great because it has such nice detail to begin with, with the raised designs and the feet.


After I was done sanding I used a big stencil brush to put on the soft wax, I used the clear. The brush was great to really help spread it around. In larger areas I used a soft cloth, then I went over the whole piece again with the cloth and somewhat buffed it. The one really nice thing about the wax is that after you are done sanding you may notice some scuffed areas on the paint that you may not have wanted there, but when you put the wax on it smooths them right out.
Can't wait to get started on my next piece and deciding what colors to try next might be a hard decision because they all look so great!

Day 31: Final Day

I can't believe I did it! It's been 31 days of posting and I am taking a big sigh of relief, as I am sure about 700 other bloggers are also doing right now. It's quite a feeling of accomplishment. I think that if I had to go one more day my family was going to throw my computer out the window! It has been challenging with kids, the day in and day out, working on other jobs and trying to come up with 31 posts everyday for a month.  I think one of the other bloggers said that one of the scariest things about this was realizing that when this was all over, it would already be November! She was right. But it was a good experience and a very good lesson in discipline. It was a lot of fun to see all the different ideas of the 700+  bloggers. I found a few good resources and some great blogs.  I also immersed myself in color for the last month so hope you enjoyed following along.

 I had mentioned a couple posts ago that I would try to paint my cabinet with Annie Sloan Chalk Paint and I did manage to do it.  I wanted to get it done to post it along with some others who also used the paint to show their final products. So go on over to Hueology to see all the great pieces that will be shared, I hope to get mine on there in time. I was impressed with the paint, but did notice as I was painting that I thought the paint did tend to get just a little bit thicker, just slightly. But I am anxious to use the other colors.  Here is my cabinet before and after. It was a sage green before, and I painted ASCP in Old White over top, then I lightly sanded it, I have not put the wax on yet but will do so in the clear wax. I tested a small spot on the cabinet with some paste wax and it seemed to start taking off the paint so I will need to use their wax product which I am sure works better with their paint. I'm happy with it and will definitely use the paint again. Best part was I got the cabinet for $125 at a antique and furniture shop.


cabinet before

and after


That is the end of my 31 days of how color transforms, please continue to check for new posts. I might take a slight break but would love some new followers and check back later this month for a holiday give away.
(sorry for the repeat on the following post I am linking up the cabinet to the Hueology party)

Sunday

Day 30: Colorful Creative Advent Calendars

Every year my kids love opening up their advent calendars. It gives them something to look forward to and helps them keep track of the countdown until Christmas day (they can visibly see how many days are left so I don't have to remind them constantly!). One thing we came across a couple of years ago, which we do in addition to an advent calendar, is a virtual one. It is by Jacquei Lawson and it is so cute! You download this virtual calendar that comes to life -  it is the cutest little village and my kids love it.
 Here are some really creative and colorful ideas for advent calendars. A lot can be done with a little bit of time and a few supplies. With some treats, wrapping paper, scrap book paper, and a few other things, these can be a fun project you and your kids could do. I found most all of them at BHG, which gives loads of ideas and ways to make them. Here are a few of the great ideas I saw.

 The little boxes below are so cute and create a very colorful tree.


BHG
  
How simple is this with the envelopes strung on a cork board.

BHG

This advent calendar  is for  the craftier ones, it is a bit more of a challenge, but I love all the different scrap book paper used and the free form stand.
 
BHG

If you can sew, which I am not too good at at all, these little hats turned upside down and strung along the window are so cute.

BHG

These are so fun, circle boxes with magnets on the back.

BHG

These are so pretty all wrapped up, like a little present to open everyday.
BHG

Little cloth bags are numbered and hung on a line.

BHG

Here they used pretty colorful paper bags all in a row.

BHG
 Whatever you do your kids will love it and have so much fun everyday with their new surprises to open.

Saturday

Day 29: Colorful Drinks for the Holidays

Three more days to go, so I am starting to get into a festive mood. That being said - here are some fun ways to liven up your holiday parties with some fancy colorful drinks.  It's nice to have just one specialty drink when you are entertaining, something that not only tastes good, but looks pretty too.  Here are some colorful drinks that are sure to bring that splash to your table.


How about this version of a hot toddy with an orange, studded with cloves and a bay leave. They make it look so pretty and I'm sure so fragrant.  Made with hibiscus leaves and agave nectar.


Bon Appetit- The Laureate

Ingredients

  • 4 orange slices
  • 40 whole cloves
  • 1 1/2 cups water
  • 1/3 cup dried hibiscus flowers
  • 4 small bay leaves
  • 1 cup aƱejo tequila (such as Gran Centenario)
  • 4 tablespoons agave nectar

Preparation

  • Stud each orange slice with 10 cloves. Bring 1 1/2 cups water to simmer in small saucepan. Remove from heat. Add hibiscus flowers; cover and let steep 2 minutes. Strain hibiscus tea into measuring cup; cover to keep hot. Run 4 brandy snifters under hot water until snifters are warm. Place 1 clove-studded orange slice and 1 bay leaf into each snifter; pour 1/4 cup tequila, then 1/4 cup hot hibiscus tea into each. Stir 1 tablespoon agave nectar into each. Serve

This would be so beautiful on any table for the holidays, Pomegranate Champange Punch.

Bon Appetit
Ingredients

Preparation

  • Bring 1/2 cup water and sugar to boil in small saucepan, stirring until sugar dissolves. Simmer 5 minutes. Cool syrup completely.
  • Combine Champagne, rum, and pomegranate juice in punch bowl. Add enough syrup to sweeten to taste. Mix in lemon slices, pomegranate seeds, and mint leaves. Add ice block to bowl.
This Blood Orange Champange Cocktail is so pretty, like a mimosa but a rich deeper color. 
  
Martha Stewart

Ingredients
  • 2 1/4 cups freshly squeezed or frozen blood-orange juice
  • 2 750-ml bottles champagne, chilled

Directions

  1. Pour 3 tablespoons juice in each champagne flute. Fill flutes with champagne, and serve.
This will warm you up, Mulled Wine, and it has such a deep rich color.


Martha Stewart
Ingredients
  • 1 large orange
  • 2 cardamom pods
  • 6 whole clove
  • 6 allspice berries
  • 6 whole black peppercorns
  • 1 cinnamon stick, plus 4 for garnish (optional)
  • 1 bottle (3 cups) fruity red wine
  • 1/2 cup sugar
  • 1/4 cup brandy

Directions

  1. With a fine grater, zest, then juice the orange.
  2. With the flat side of a knife, press firmly on the cardamom pods to bruise them. In a large pot (not aluminum), combine zest, juice, cardamom, cloves, allspice, peppercorns, cinnamon, wine, sugar, and brandy. Cook over medium heat, stirring, until sugar dissolves, 1 to 2 minutes.
  3. Reduce heat to low; simmer until flavors have melded, about 30 minutes. Pour through a fine-mesh sieve; garnish with cinnamon stick, if desired. Serve immediately.


How about this for a warm up after dinner, hot cocoa, the peppermint makes it so festive for the winter season.
Martha Stewart
 Ingredients
  • 1/3 cup unsweetened cocoa powder
  • 1 quart milk
  • 1/2 cup semisweet chocolate chips (3 ounces)
  • 7 peppermint sticks; 3 crushed (1/4 cup), 4 left whole
  • pinch of salt

Directions

  1. Place cocoa in a medium saucepan. Gradually whisk in milk until cocoa has dissolved. Add chocolate chips and crushed peppermint; simmer over medium heat, stirring occasionally, until chocolate and peppermint have melted, 8 to 10 minutes.
  2. Bring to a boil and immediately remove from heat. Add salt. Ladle into mugs; serve each with a peppermint stick.
It wouldn't be the holidays without some good old eggnog, try this Eggnog Martini.


Martha Stewart

Ingredients

  • 1 cup sugar
  • 1/4 cup cornstarch
  • 1 teaspoon ground nutmeg
  • 1 teaspoon pumpkin-pie spice, plus more for garnish
  • 8 cups whole milk
  • 6 large egg yolks
  • 3 cups brandy

Directions

  1. Set a large fine-mesh sieve over a large bowl. Place bottom of bowl in an ice bath; set aside. Off heat, in a medium saucepan, whisk together sugar, cornstarch, nutmeg, and pumpkin-pie spice. Gradually whisk in 4 cups milk, taking care to incorporate the cornstarch. Whisk in egg yolks.
  2. Whisking constantly, cook over medium heat until the first large bubble sputters, 10 to 12 minutes. Reduce heat to low; cook, whisking constantly, 1 minute more. Remove from heat; immediately pour through sieve into bowl. Stir in remaining 4 cups milk. Let cool completely in bowl still set in ice bath.
  3. Just before serving, stir in brandy, and ladle into glasses; garnish with pumpkin-pie spice.

How about a gazpacho Bloody Mary for a holiday brunch- recipe from Bon Appetit


Ingredients

  • 2 28-ounce cans Italian tomatoes (such as San Marzano) with juice
  • 1 English hothouse cucumber, peeled, chopped (about 2 cups)
  • 1/2 cup fresh lemon juice
  • 2 tablespoons fresh cilantro leaves
  • 4 teaspoons prepared horseradish
  • 4 teaspoons Worcestershire sauce
  • 2 teaspoons celery salt
  • 12 dashes of hot pepper sauce
  • Ice cubes
  • 2 cups vodka
  • 1 English hothouse cucumber, halved crosswise, then quartered lengthwise

Preparation

  • Working in batches, puree first 8 in blender until smooth. Transfer Bloody Mary mix to large pitcher; season with pepper. Chill until cold, at least 1 hour.
  • For each drink, fill 8-ounce highball glass with ice cubes; pour 1/4 cup vodka over. Add Bloody Mary mix; garnish with cucumber spear
Hope that will add a little color to your tables this holiday season, cheers!

Friday

Day 28: Annie Sloan Chalk paint


I just discovered this new paint, Annie Sloan Chalk Paint.(check out the website for tons of info and colors).  Thanks to the ladies over at,  Hueology, they have devoted their 31 days all to the paint, you should go check them out, they are doing some really great things. Well I recently went out and found a vendor near me to see what it was like.  They had a sample there of the Graphite and Old White on a set of chairs and table.  I realized that it is a lot like buttermilk paints, it has a very flat, dry looking finish, just like buttermilk paints. But their claim to fame is that you do not need to do any prep work whatsoever before you paint a piece, no sanding ,no stripping, nothing. Sounds to good to be true, right? Well, from what I can tell, it lives up to the hype.


The paint seems to be very versatile. If you don't care for the flat finish of the paint, she also carries a clear wax and a dark wax to put over the pieces after you are done painting.  From what I saw, I would highly recommend using the wax to protect and give a nicer finish on furniture. It's also nice because it allows you to distress the pieces and use more then one color. You can also use it on walls, floors and it does work as blackboard paint as well. The paint can be thinned with water or you can even leave the lid open and let it thicken up a bit. I purchased the Old White and I plan to use it on a cabinet I just got. I tried a small part of it so far, so good, so I'll see what I think when I am all done. And I better hurry because if I get it done by Monday the ladies over at Hueology are having a linky party to have pictures posted of all the wonderful things others have created with Annie Sloan Chaulk Paint.

The pieces they show on the website look transformed, very old world and french inspired (which is also the inspiration for the color palette as well). Here are a few photos from  Annie Sloane website of some pieces:

photo via Jolie Design-using ASCP

ASCP Duck Egg Blue


ASCP Emperors Silk

ASCP Henrietta
I am going to get out my paint brush and get started, I will post a before and after of my piece and let you know how it went when I am all finished. Check out all the pieces on Monday over at Hueology, should be neat to see what has been done.

Thursday

day 27: mad about plaid

wool plaid amaryllis bulbs

Plaid - we all love it in the fall and winter, right? It's cozy, comfortable, and I always think of the holidays.

Today, I couldn't wait to share all these really creative ways to use all those old wool plaid blankets that we all may have. You know the ones - maybe you got them from your grandparents or parents?  I know that my parents seem to have a few of them and I might stop by tomorrow to "borrow" them. They probably won't  notice some star shaped holes cut in them, right?


Plaids come in so many colors. Most are perfect for the holidays with lots of greens, reds, and whites. I love the black ones too.Well anyhow, check out these creative ideas I saw at my most favorite place to go - Terrain.  I went there on an impromptu outing with my mother, 2 aunts and one of my cousins. It was a lot of fun, so be prepared to get out your scissors and start decorating with plaid for the holidays..


What a great way to add color to some plain old books for the holidays-wrap them in plaid and add some greens.


How creative is this- wrapped logs in plaid for a little fun in with the greens.


How about wrapping your mantle in plaid, maybe a decorative one.


This might be my favorite, I would never have dreamed of putting a deer head on my walls, but in the plaid it looks so cute!

How great would a few of these be hanging together on a wall?


Even the table and table legs are wrapped in plaid, love how they used the fringe with it.


Here is a blue plaid with another mantle,would work on a shelf too.


These are so cute and would make such a great housewarming gift- they are wool plaid wrapped amaryllis bulbs! (the very first picture shows some others) - how about bringing these for someone to enjoy for weeks. Another idea, wrap a wine bottle in plaid to be really festive for a housewarming gift.


These bottles are now all dressed up for the holidays. You could do this with any size bottles - it would be fun with a bunch of small bottles grouped together.

Hope that gave you some creative ideas to use plaid this holiday season.

Wednesday

Day 26: Paper Whites and Pointsettias

BHG
I was never a huge fan of poinsettias but I've learned to love them. Last Christmas I cut my own stems off, like in the picture above, and got out  a variety of old bottles and small vases and put the stems in them. You would be so surprised how long they last in there - I think I counted a few weeks.  They look so pretty on a mantle and placed here and there for the holidays. They add a nice punch of color. I loved mixing all the different shades, from white to varigated to the red, and it is so easy
.
Real Simple
One thing that I have done ever since I can remember is to grow paperwhite bulbs.  I get the bulbs around Thanksgiving and by Christmas they are blooming. They are so easy to do, they can grow in just about anything, pebbles,rocks, dirt whatever. I get together about six containers of them and place them around the house.  It is so fun to watch them grow- my kids get a big kick out of them every year. I have found that they are an acquired scent, I love the way they smell but not everyone does. But to each his own. I can't wait to get mine started and have that great fresh green and white colors spread through out my home.


Real Simple

Tuesday

Day 25: Vintage Tea Party

All photos by Jennifer Rizzo
 I was online looking at one of my  favorite blogs, Holly Mathis Interiors, and she had a posting on there about another blog that I couldn't wait to go look at.  The blog is by Jennifer Rizzo.  I was happy to have caught it just in time, as she is promoting her "Vintage Tea Collection" and having a "Winter Nesting giveaway." The things in the basket for the giveaway are simply wonderful.


She set up what looked like a Tea Party in her back yard. The way she displayed everything and set up her photo shoot for all her pictures is so beautiful. It made me want to read more and stop by for a cup of tea!  I loved how interesting and inviting she made her back yard seem, so fun and so colorful. The multicolored teacups she has hanging from the tree are magical.  (go to her blog and see what creatures were lingering about during the setup, it's really cute).


love this chair with the tea cups and pillow


She has an Etsy shop which was the kick off for the post for the Vintage Tea Collection, my favorite are the  pillows....


And also the vintage jewelry


 It's fun to go on other blogs to see the creative and inspiring ideas of others who share similar interests. Her blog  has such a nostalgic and vintage feel that I just love.
How fun are the silver platters teapots and cups and dishes? I may have to get out my silver platters I have of my grandmother's.


 I was also feeling pretty good when I saw a picture of her kitchen, which was recently featured in Country Living. It is a little similar to my own kitchen, so it made me feel pretty good about my design decisions.

Her kitchen
my kitchen


 Can't wait to read more on her blog and look forward to seeing what else she has to share.

Website

I finally got my website up and running, really don't know why it took me so long! You can check it out here  Thanks for checking ...